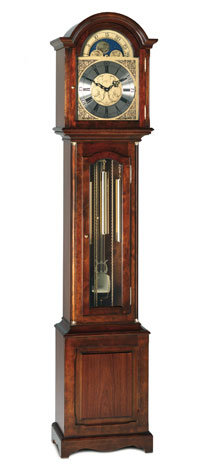
The following procedure is for setting up long case grandfather clocks after repair or repositioning.
Remove the hood of the case by sliding it towards you, securing the glass door before laying the hood on the floor. You now need to check that the wooden supports, which the clock seat board (this is the wooden board attached to the clock mechanism) sits on, are level. The clock needs to be level to operate correctly. Place the clock seat board on top of the wooden supports, carefully aligning the seat board between the sides (You can put the hood on to see if the dial is aligned correctly, but you will need to take it back off before proceeding with the set-up).
Make sure that the cords and pulleys are hanging freely in the case. Now attach each correct weight to the pulleys (the heavier weight will normally be on the side of the striking mechanism). – Ask someone to secure the mechanism while you attach the weights, so that it does not fall forward. When attaching the weight to the pulley, you should grip the pulley (with the cord round the groove) firmly and then lower the attached weight slowly into the case until the cord is tensioned. After both weights are positioned correctly, you can now proceed to attach the pendulum. Hold the pendulum with one hand and guide the suspension spring (which is at the top of the pendulum) through the crutch pallet (which is the steel rod at the rear of the clock - see diagram) and attach the suspension spring to the suspension bracket (the brass piece at the top of the back plate of the movement -- see diagram).
You are now ready to start the clock.
Firstly, you should slowly wind up both weights. Only wind them up a small amount. Now gently push the pendulum and listen to the tick. The tick should be even. If the tick is not even, then you can rectify this by either bending the pallet crutch to the left or the right (see diagram) until you hear an even tick. Try one side first; if this does not work try the other side. Alternatively, you can place small pieces of wood or cardboard under one of the side of the case feet to level the clock Once you have an even tick you can put the hood back on and wind the clock up fully. To set the time, slowly move the minute hand round in a clockwise direction until the clock is at the right time. Please make sure that when you pass the hour, that you allow the strike to finish before moving the hands on. Your clock is now set.
The clock should operate for around a week before needing to be wound up. Within a few days you should notice how well the clock is keeping to time. If the clock is going too fast or too slow, there will be an adjuster screw/bolt below the pendulum bob (the round piece at the bottom of the pendulum). If the clock is going too fast, turn the screw to the left. If it is going too slow, turn the screw to the right (this will push the bob up and increase the speed of its swing). It may take a series of small adjustments over several days to get the clock to keep to the right time. Be patient though, you will eventually get the clock to keep good time.
Trouble shooting
If after setting up your clock, it refuses to go or stops, you should check the following points:
- As mentioned before, check for an even tick. The clock will not operate correctly if there is an irregular beat.
- Check that the pendulum is not touching the back of the case or the weights (the case may require levelling).
- Check that the crutch is not rubbing against the back of the case.
- Check that the weights are not rubbing against the front of the case (they may foul the bottom edge of the door entry).
- Check that the suspension spring is positioned correctly through the crutch. It should be central.
- Check the hands for clearance. Possible problems – minute hand touching the glass or hands touching each other.
- If the clock stops when the weights are about level with the pendulum bob, this may indicate that the case is rocking slightly, causing the weights to swing against the pendulum action. Contact us if this occurs.
Maintenance
Your clock has been fully overhauled and therefore will be in good working order. However to maintain the clock’s condition you should have it checked and serviced every 4-5 years. (Please note - Do not attempt to oil the clock yourself. This should be done by a qualified repairer. Over-oiling a clock can affect the running and condition of the clock).

 Default Currency
 Euro
Euro
